Intro
In the last tutorial, you learned to change the appearance of specific areas by sharpening or blurring them. This tutorial show similar tool which allow you to lighten and darken specific areas. In Level 3, you'll be shown how to adjust and image's overall lightness, contrast, etc. The Dodge and Burn tools allow you perform basic exposure editing on just the areas that need it. After touching up a section using the Dodge and Burn tools you might need to brighten up the color bit, the Sponge Tool will help you this. These tools are used in photo editing, adding dimension and graphic design. Dodge and Burn get their names from terms used in photographic darkroom work. The settings are similar to the Brush Tool. Check out the video at the bottom of the page for more help.
Dodge and Burn
For this tutorial I'll show you these tools together, rather than separately like previous examples. Below is the flyout for these tools, which can also be accessed by pressing the "O" key on your keyboard.
When you start either the Dodge or Blur tools, you see the Option Bar change. If you've been following the tutorials, you'll know what these options are by now.
The only new one here is Range. This allows you choose Shadows (dark areas), Midtones and Highlights (bright areas). In many cases you'll leave it on midtones to affect the areas more evenly.
Example in Graphic Design
Using these tools in graphic design allows you to add depth. Take a look at the two balls below. The one on the left was created by selecting a round marquee and filling it with the Paint Brush tool. Then it was copied to the right. The one on the right was then modified using the burn and dodge tools.
As you can see the one on the left looks like a dot, the one on the right looks like a ball. The highlight was created with the Dodge Tool and the shadow at the bottom was created with the Burn Tool.
Start a new drawing and try to duplicate the ball.
• Select a Round Marquee and create a circular selection by holding the shift key as you select.
• Fill it with your favorite color
• Copy it so you can re-use the original if you need
• Use the Dodge Tool to create the Highlight. Don't make it too large, and use a small hardness value.
• Use the Burn Tool to create the Shadow. Make multiple passes to make the larger area.
It might take a couple of tries. Where you put the shadows and highlights will determine the light direction. If you have several objects in your image, they will need to be the same. A softer highlight would indicate a softer light source or material for your ball. Try creating another ball that has a hard shadow and highlight. See how the look and feel differ. Work on different shapes and try to add realistic depth to them. Put the highlight on one side and the shadow on the opposite to create a realistic lighting effect..
Photography Example
The same basic techniques can be applied to photography as well. The main difference and challenge is to select the correct areas to edit. This example will require you to use some of the selection techniques you were shown in tutorials 1-3 and 1-4. If you want to take time to review them, I'll wait.
You can use any image, but here is a good one for you to practice on. It's a photo of an egret I took in a park near St. Petersburg Florida. Egrets are hard to expose properly as they are a sliver of white against a usually darker background. I was able to take a number of photos while adjusting exposure, but this is one of the earlier ones and a little dark. Select the feathers as best you can, and see if you can improve the exposure. In this example, you'll need to use subtle changes.
Here's another image. This was taken in the Smithsonian in Washington DC. As you can see, there was bright light coming in through the windows, but most of the area was not lit very well. Using the Dodge and Burn tools (mostly the dodge tool) see if you can improve the dark areas of this image by lightening them up a little.
Tip: I used to have trouble remembering which tool did what. Did Burn make it lighter or darker? I use this tip to help me remember - the Burn tool is the 'hand' that can be burned - and 'the flesh' will look darker afterwards.
Sponge Tool
The Sponge Tool works very similar to the Dodge and Burn tools. The difference is that instead of controlling exposure, it controls Saturation. Saturation refers to the amount of color in an image. An image with low saturation looks very monotone, while an over saturated images looks very colorful and artificial. There are times when you might want these effects in just particular areas, and not the entire image.
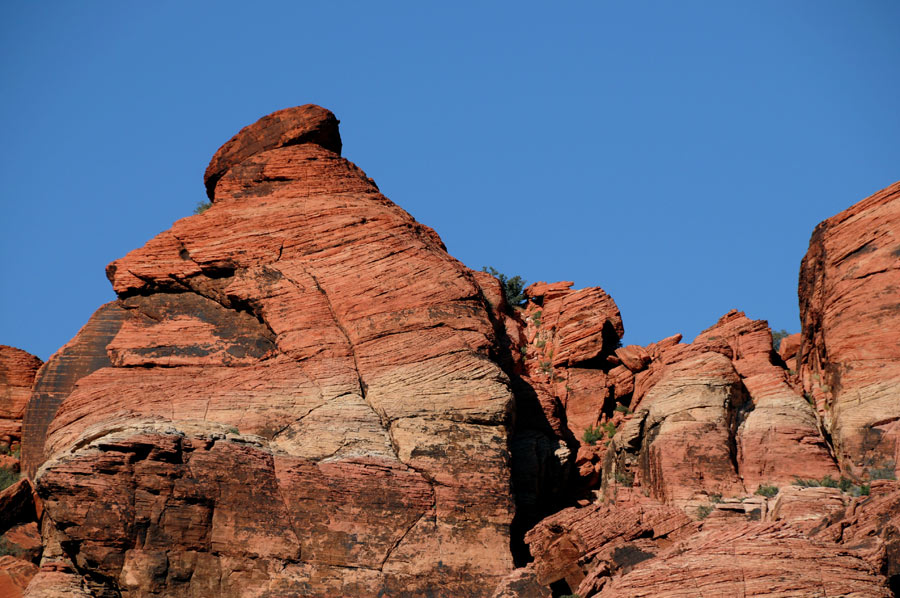
Here's an image from Red Rock Canyon, just outside of Las Vegas. It will offer a great example of how you can use the Sponge Tool to affect Saturation. In this exercise, you can Select the sky using the Magic Wand, then Select the Inverse to have only the rocks selected. Use the Sponge Tool to change the Saturation on the rocks. Once you have the rocks done, invert the selection (CTRL+Shift+I) to change the sky.
In the Sponge tool option bar, you can choose to Saturate or Desaturate.
Conclusion
These tools allow you to correct small or large areas of your image. In many cases, it's much better just to adjust what needs to be changed rather than the entire image. Working with these tools will make your images stand out with better exposure, contrast and depth. Learning to use them so that it isn't apparent is the challenge.
Many people will use Dodge and Burn in small increments so that they can gradually and accurately adjust the image. Try using the tool with a 10%. Try this approach and you should be able get great results.
Reference
Read some history of the Brooklyn Dodgers
Learn to heal a Burn with honey
Some interesting facts about Sea Sponges

