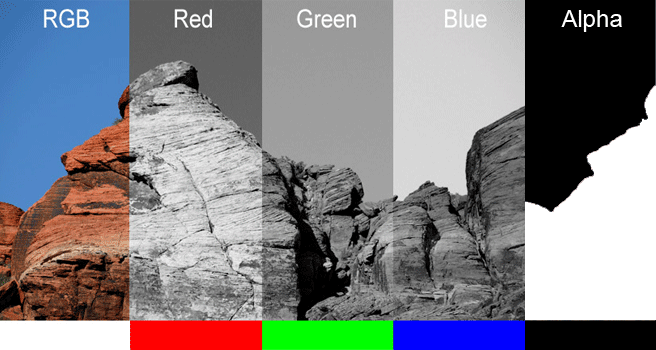
Channels are layers of color information, weather it be RGB, CMYK, Alpha, or Spot Color information. Do not confuse these with "Layers" that can be manipulated. Channels hold color information and when sandwiched together, they blend that color information to produce the full color image (example: Blue+Yellow=Green). Check out the video at the bottom of the tutorial for more information. An "Alpha Channel" is basically a mask, it masks out whatever is on the "Alpha Layer". It is an 8-bit channel, which means that it has 256 levels of gray from 0 (black) to 255 (white). The black blocks the color completely and the white allows the color to be seen. Any value in between will allow that value of color to show through the mask. So if that value is 50%, then 50% of the image will show through. Let's say that you want the background masked out, or you want the background to be transparent. You would select the background (in this case the sky) and turn it into an Alpha Channel.
You can only save Alpha Channels in a file format that supports them, these include PSD, PDF, PCT, TIFF, and RAW. So if you create an alpha channel and then save the project as a JPG, your Alpha Channel will be gone (as well as all of your other layer information) when you open it again. We'll cover the file format differences in another tutorial.
Making an Alpha Channel
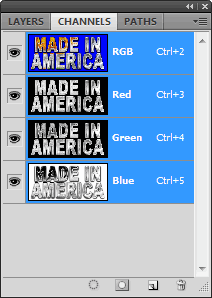
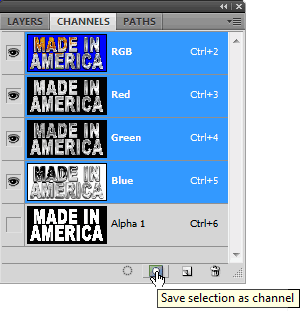
This is what the "Channels Palette" looks like without the "Alpha Channel". The RGB layer is a composite of the Red, Green, and Blue channels. You can switch between them to see how much of each color make up the full color image. Because the text and the background are on different layers you can easily select the text. Navigate to the the layer with the text on it and while holding down the "CTRL" key, click on the image icon of the active layer. This will select the object on that layer. Which will be indicated in the workspace with a moving outline (see below).
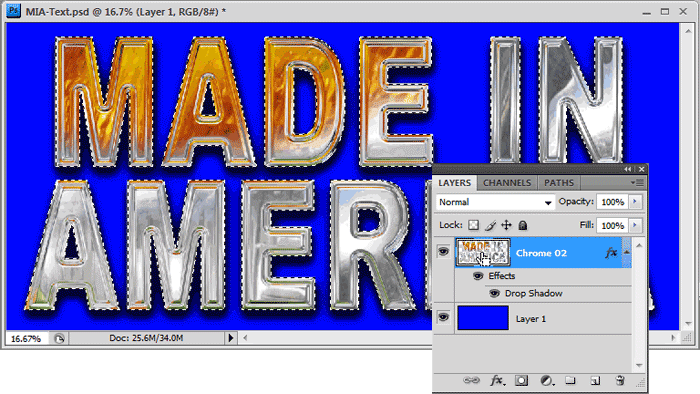
Because the "Drop Shadow" is a "Blend Option" you do not see it in the alpha channel. Let's fix that, while we're here... We need to change the "Drop Shadow" FX of Chrome 02 layer, into a layer of its own. You do this by "Right Clicking" on the "fx" icon and choosing "Create Layer" from the drop down menu. You will see a new layer appear below the active layer. This layer contains all of the shadow information which can now be manipulated in anyway a layer can be adjusted. Select the objects on both layers by "CTRL +Click" on one layer then "CTRL +Shift +Click" on the other. This will select the objects on both layers and add them together. You can now navigate to the "Channels Palette" and create a new alpha channel as we did above. The image below is a close up of both alpha channels, the one on the left is the first alpha channel without the shadow, on the right is the second one we made with the shadow by extracting the FX and combining both layers.
Conclusion You will also see Channels appear in other tools like the Channel Mixer which you can use for adjusting color, but there are better tools for that. |
|||
<< Previous Tutorial |
Return to List |
Next Tutorial >> |
|

Owned and operated by The Art Department, Chester, NE |
Last Update: |