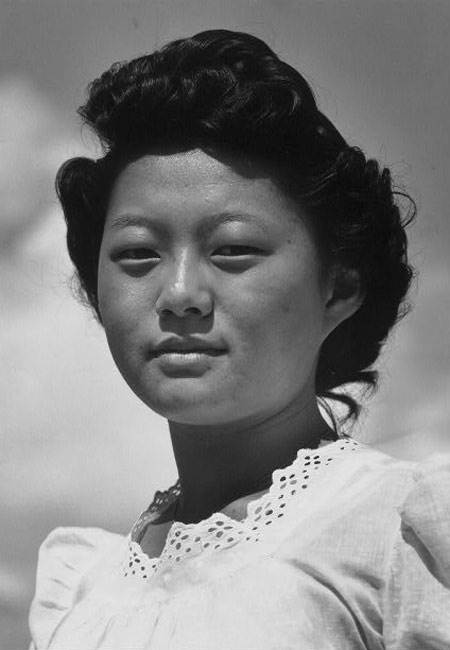
3-10 : Adding a Soft Focus EffectIntro In the day of film this was often achieved with a filter added to the lens which would create a softer halo on the negative. In the digital age, this can be done with Photoshop - and very easily as well. The advantage of doing this digitally is that you can preserve the original image and create another image with any degree of softness you like.
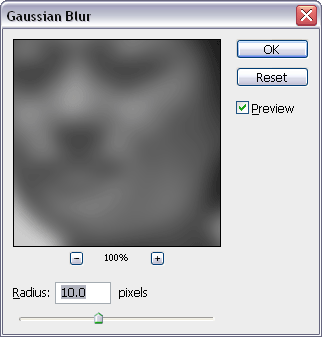
Soft Focus See how the face, clothing and hair all seem softer. This effect is easy to add in Photoshop. Start with any portrait you have or download the sample. There are several ways to achieve this look I'll show you one of them. First you need to make a duplicate layer. In your layers window, right-click on the image layer and choose "Duplicate Layer". Next navigate to Filter > Blur > Gaussian Blur. You should see a dialog box like the one below.
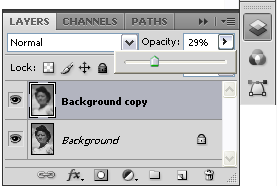
For this image I used a radius of about 10 pixels. This number will depend upon the size of your image as well. When you have the blur you want, press OK. Now you have 2 layers, one is the original, the other is blurred. The blurred layer should be above the original and if it isn't, just click on it in the Layers palette and drag it up. Next you need to adjust the opacity of the blurred layer. This changes how much effect the top will have (combined with the amount of blur). Usually a setting of about 20-25 will do the trick.
That's all there is too it. I've seen other people use 2 or three other steps to achieve this look, but I find that this method is simple, quick and does a nice job. One option to try is to lighten the top image before or after blurring.
Conclusion Reference |
|||
<< Previous Tutorial |
Return to List |
Next Tutorial >> |
|
Owned and operated by The Art Department, Chester, NE |
Last Update: |


