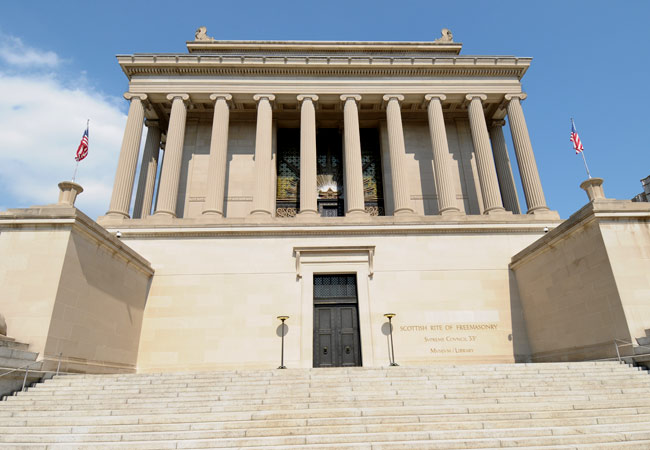
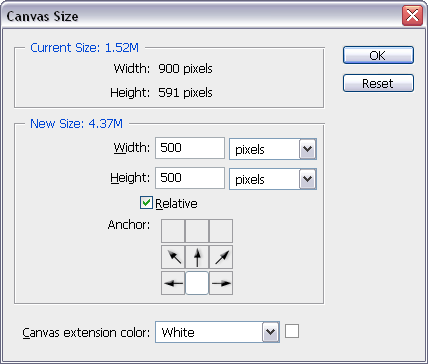
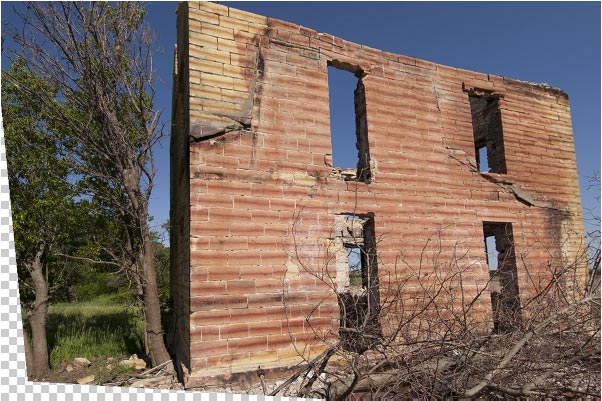
3-9 : Correcting Lens & Image DistortionIntro Perspective As you can see, I can't retain the full scope of the image, but I can get a less distorted look. You can't have everything, right? Here is a sample image if you need one for this tutorial. In this case there is a lot of correction that can be applied, so I am first going to increase the Canvas Size. This changes the working space, without affecting the image. To do this navigate to Image > Canvas Size. You'll see a dialog box pop up and enter the numbers and check the boxes you see below.
By making this setting you are making the canvas larger to the top and the sides, your image will be anchored to the middle of the bottom of the page. By clicking in the square indicated with red, you define the direction of the resize. Now you should have a large area around the image using the color of the background. The amount that you enlarge the canvas will depend upon the original size of the image that you are working on.
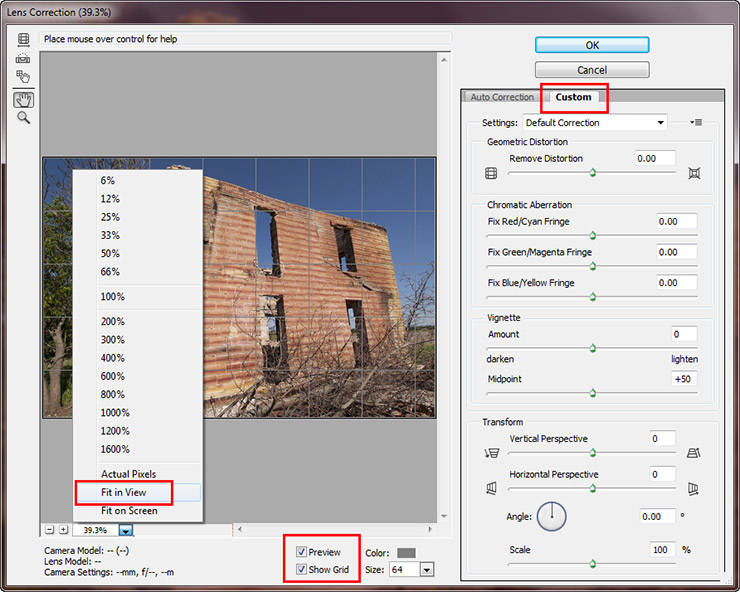
Use the magic wand by clicking in the new background area to select the background and it should selected everything but the image. Then create the inverse selection (Select > Inverse or CTRL+SHIFT+I). With the image selected you can start the transformation. Navigate to Edit > Transform > Perspective. Now pick on one of the grips in the top left or right and pull it out to the side until you straighten the pillars and press Enter. Next you can pull the image up to make the pillars taller. Navigate to Edit > Transform > Scale (or press CTRL+T). Now grab the box that is top-center and pull it up so that have a height that you like. One problem you'll find with transforming images is that you can end up enlarging the image and losing quality. Try to start with the largest, clearest image you can. The Transform tool has other options (so far you've used Perspective and Scale). The only other one you might use in with photos is Distort. Distort allows you to grab a corner box and pull it in any direction. You'll use Distort when you don't have true perspective to work with. Skew Here's a sample image to use for trying out the distort transformation. See if you can make the building look a little more square with this tool. Press CTRL+A (Select All) to select the whole image, then navigate to Edit > Transform > Distort. Now you can click on any of the grips to make the adjustments you desire. Lens Correction Filter in Photoshop A lot times you might need to make some slight corrections and there is a simple way of this in Photoshop. There is actually a "Lens Correction" filter that adjusts the geometric (usually barrel) distortion found in many wide angle lenses. If you open a photo in Photoshop, navigate to Filters > Lens Correction... and you will see that a new window open up. I usually use the custom settings to make it easier to get exactly the changes that I need.
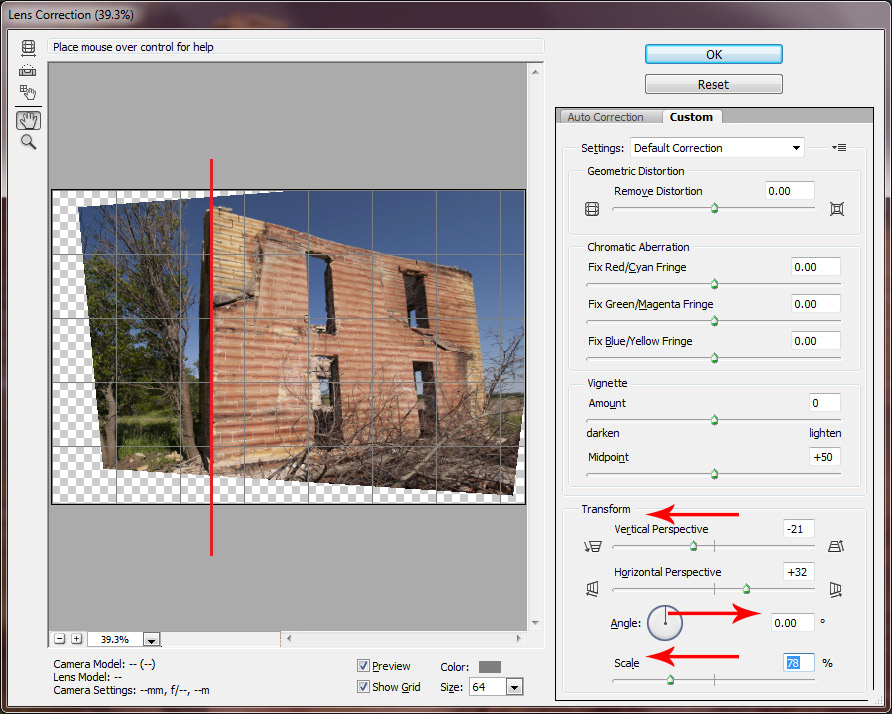
Look at the image above and see what areas are highlighted. I have clicked on the Custom tab, selected my image to fit in the view window and checked the Preview and Show Grid boxes. Now I'm ready to adjust this image. Having the Grid on helps you adjust your walls to be straight. For this tutorial we won't worry about Chromatic Aberration or vignette corrections. Have a look at the Transform sliders. This will allow you adjust your image and straighten lines to get the image that you want. It might be a subtle or major change depending upon your image and the effect that you want. Use the Scale slider to view how the borders of your image are being affected by the persepective changes.
Now that I've made some adjustments I can see how my image is getting closer to what I want (straight walls). I've got the left side straight, but will still neet work on the right side. This is as much as I can correct it in this tool, so I'll press OK.
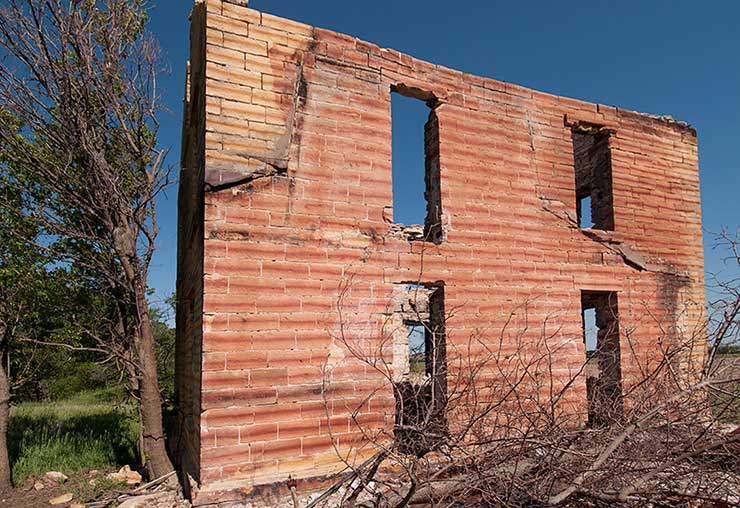
Now I can give some minor tweaks to my image and crop it.
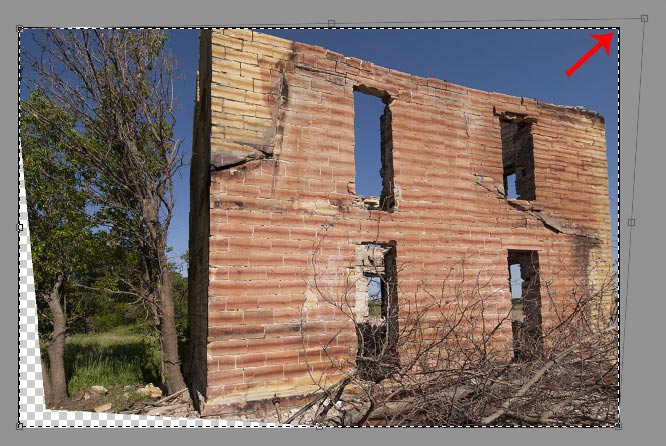
To make my final adjustment, I've pressed CTRL+T (transform) and then picked the top right handle while holding down the control key. I've stretched the corner out and now I'll crop the image to remove the blank space. Move your mouse over the image below to see the before and after.
Conclusion Reference
|
|||
<< Previous Tutorial |
Return to List |
Next Tutorial >> |
|
Owned and operated by The Art Department, Chester, NE |
Last Update: |
